
How to Stop Wooden Tabs From Breaking in Miniature & Book Nook Kits
There is a very specific kind of panic that happens during a wooden miniature build.
A tab is halfway into a slot.
It feels a little too tight.
You push just a bit harder.
And then—
snap.
A tiny wooden tab breaks off in your hand.
It is frustrating, especially when the part is decorative, difficult to replace, or already surrounded by several pieces you spent an hour assembling.
The good news is that broken tabs are often preventable.
In most cases, the best strategy is not to make yourself better at forcing pieces together. It is to recognize resistance earlier and fix the fit before the wood is under enough stress to break.
For laser-cut miniature houses, book nooks, wooden models, and similar press-fit kits, a simple rule can prevent a lot of damage:
Dry-fit first. If a tab needs force, stop and find out why.
Quick Answer: What Should You Do If a Wooden Tab Is Too Tight?
Do not force it into the slot.
First remove the piece and check for burrs, splinters, laser-cut residue, or a tab that is slightly too wide. Lightly sand only the contact area, test the fit again, and repeat if necessary.
If the part is long or delicate, support it close to the joint while inserting it instead of pushing from the far end.
Wax can sometimes reduce friction in wood-on-wood connections, but it should not be your first solution for a tab that physically does not fit. And if the surface will later need to be glued, avoid waxing that bonding area because wax can interfere with adhesive performance. Wood-adhesive guidance consistently recommends clean, dry, contaminant-free bonding surfaces.
If a tab has already snapped, do not immediately push it back into the tight slot. Repair the break first, allow the adhesive to cure, and correct the tight fit before trying again.
Wooden Tab Troubleshooting Quick Reference
| What You Notice | Likely Problem | What to Do |
|---|---|---|
| Tab will not enter the slot at all | Tab too wide, slot obstructed, burr or residue | Check orientation, clean the slot and lightly sand the contact area |
| Tab starts to enter but becomes extremely tight | Press-fit tolerance is too tight | Stop, remove it and sand gradually |
| Thin piece bends while you push | Force is being applied too far from the joint | Support the piece close to the tab and push straight |
| Piece is difficult to remove from the wooden sheet | Holding points are not fully released | Cut the remaining attachment points instead of twisting the piece free |
| Tab goes in but wood begins cracking around it | Too much outward pressure on the surrounding material | Stop immediately and reduce the tab fit |
| Tab fits but connection feels rough | Surface friction or rough edges | Smooth the contact surfaces first; wax may help in suitable non-glued joints |
| Tab snapped cleanly | Local break | Glue it back, allow it to cure fully, then loosen the slot before reinserting |
| Tab is missing completely | Original press-fit connection is lost | Check alignment and reinforce the hidden joint with an appropriate adhesive or backing piece |
Why Do Wooden Tabs Break?
A broken tab can look like a material-quality problem, but sometimes the real problem starts with fit.
Press-fit wooden kits depend on small dimensional differences.
The tab must be wide enough to hold securely inside the slot, but not so wide that inserting it creates excessive stress.
With laser-cut parts, even very small differences matter. Laser cutting removes a narrow amount of material known as the kerf, and press-fit designs have to account for it. Tiny changes in material thickness, cutting, residue, coatings, or the individual part can change how tightly two pieces fit.
At miniature scale, a difference that looks almost invisible can be enough to turn:
firm fit
into:
this definitely does not want to go in.
The mistake happens when we treat both situations the same way.
Firm Is Normal. Extreme Resistance Is Not.
Press-fit pieces often need some pressure.
That does not mean every difficult joint should be forced.
A good press-fit connection may feel snug, but the tab should usually move into place with controlled pressure.
Be cautious when:
the tab stops abruptly,
the surrounding wood begins flexing,
you hear cracking,
the slot starts spreading,
the surface begins whitening or splitting,
or you find yourself thinking:
“Maybe if I just push harder…”
That thought is often your signal to stop.
The five minutes you spend removing and adjusting a tight tab are usually easier than repairing it after it snaps.
Always Dry-Fit Before Adding Glue
Before gluing a major wooden connection, assemble it without adhesive when possible.
A dry fit tells you whether:
the pieces are correctly oriented,
the tab actually fits,
the slot is clear,
the joint sits flush,
and the parts align with the next stage of construction.
Woodworking adhesive guidance also emphasizes that surfaces should be clean, dry, and close-fitting before bonding. Glue is designed to join suitable surfaces; it is not a good substitute for fixing a badly fitting joint.
If a tab cannot comfortably enter the slot while dry, adding wet glue usually does not solve the underlying issue.
Fix the fit first.
Check the Orientation Before You Sand Anything
This sounds obvious.
It becomes much less obvious after two hours of miniature building.
Before removing material from a tight tab, check the instructions again.
Look for:
- arrows
- printed part numbers
- front/back orientation
- left/right pieces
- tabs of slightly different lengths
- slots that look similar but are not identical
A part inserted backward can feel suspiciously like a manufacturing tolerance problem.
Sanding should be a fit adjustment, not a way of forcing the wrong part into the wrong place.
Look for Burrs Before Making the Tab Smaller
Sometimes the tab itself is not actually too large.
The problem may be a tiny obstruction.
Laser-cut pieces can retain small rough areas where they were attached to the surrounding sheet. You may also find a thin splinter or raised edge.
Run your fingertip carefully around the tab.
Then inspect the slot.
You are looking for anything that prevents the two flat surfaces from sliding past each other cleanly.
If you find a small burr, removing that may be all the adjustment you need.
Do not automatically sand the entire tab.
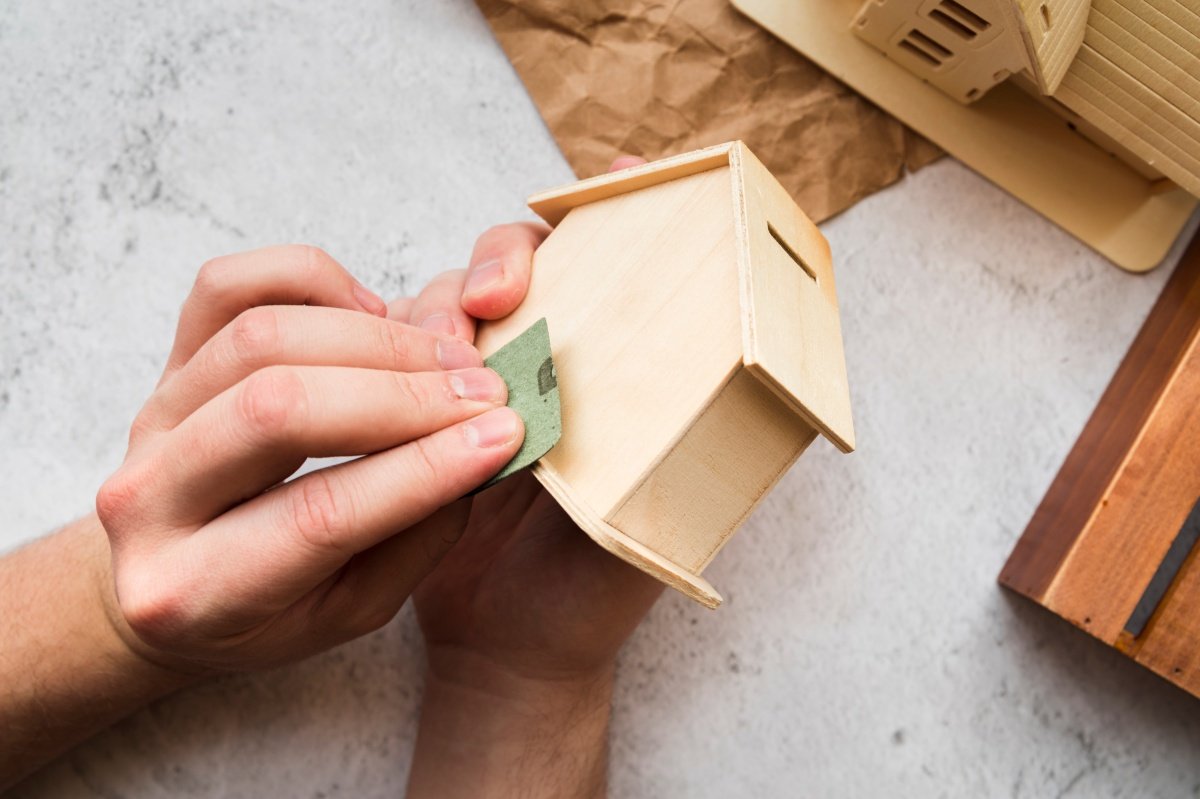
How to Sand a Wooden Tab Without Ruining the Fit
The goal is not:
“Sand it until it becomes loose.”
The goal is:
“Remove the smallest amount of material necessary.”
For tiny model parts, controlled sanding matters more than speed.
Abrasive guides classify roughly 180 grit as fine and 220 grit as very fine for wood finishing. Because miniature tabs require only small adjustments, a fine abrasive is usually a better starting point than an aggressive coarse grit.
For a tight tab, make one or two light passes.
Then test it.
Still too tight?
Make another pass.
Test again.
This feels slower than sanding continuously for twenty seconds.
It is actually faster than discovering you removed too much material and turned a tight joint into a loose one.
Where Should You Sand: The Tab or the Slot?
Usually, start with the tab because it is easier to reach and easier to control.
If the tab is clearly too wide, lightly sand the faces or edges that are creating the interference.
Do not automatically shorten the end.
A tab can be the correct length but slightly too thick.
Removing length will not solve that problem.
Some laser-cut fabrication guidance recommends sanding the tab faces rather than the ends when a finger joint is tight, because the goal is to reduce the interference without unnecessarily changing the depth of the joint.
If the slot itself contains an obvious burr or obstruction, clean that instead.
The important thing is to identify where the interference actually occurs.
A Nail File Can Be Surprisingly Useful
You do not necessarily need a full sheet of sandpaper for miniature work.
A fine nail file or small sanding stick can be easier to control on tiny tabs because it gives you:
a rigid sanding surface,
a narrow working edge,
and better access to small areas.
The advantage is precision.
You are less likely to accidentally sand the decorative face next to the tab.
Whatever tool you choose, the same principle applies:
remove a little, test a lot.
Be Extra Careful With Printed or Painted Pieces
Some wooden miniature parts already have their final decorative surface.
That means aggressive sanding can remove:
- printed artwork
- painted color
- stained edges
- protective coatings
If the decorative face is visible in the finished model, avoid sanding it whenever possible.
Work only on the hidden contact surfaces of the tab.
This is another reason to use a narrow sanding tool instead of wrapping sandpaper around the entire piece.
Push Straight, Not Sideways
A tab can fit perfectly and still break if it is inserted at the wrong angle.
Imagine a thin wooden railing with a tab at the bottom.
If you hold the railing near the top and push sideways, the long piece acts like a lever.
Very little movement at your fingers can create much more stress near the tiny tab.
Instead, support delicate pieces close to the connection point.
Apply pressure in the direction the tab is supposed to travel.
If the tab enters straight down:
push straight down.
If it slides horizontally:
push horizontally.
Avoid rocking a fragile wooden part aggressively from side to side unless the instructions specifically require that motion.
Support Long, Thin Pieces Close to the Joint
This matters particularly with:
window frames,
railings,
signs,
decorative arches,
thin wall pieces,
tree branches,
and narrow structural strips.
The farther your fingers are from the tab, the more the surrounding piece can flex while you apply pressure.
Move your fingers closer to the joint.
Whenever possible, support both sides of a delicate piece.
You are trying to apply pressure to the connection, not bend the entire part until the connection submits.
Do Not Twist Pieces Out of the Wooden Sheet
Another common break happens before assembly even begins.
You press a laser-cut part out of the wooden sheet.
Most of it releases.
One tiny point remains attached.
You bend the piece.
Then twist it.
Then—
snap.
If a delicate piece does not release easily, look for the remaining attachment point.
A sharp craft knife can be used carefully to separate small holding points instead of forcing the part to tear free.
This is especially useful for very thin:
frames,
railings,
branches,
ornamental trim,
and narrow tabs.
The important distinction is between cutting the attachment point and using a blade to pry the piece upward.
Cutting is controlled.
Prying can concentrate force on the very part you are trying to protect.
What About Wax for Tight Wooden Connections?
Wax deserves a little nuance.
Woodworkers have long used paraffin and beeswax as dry lubricants on wood-on-wood surfaces because they reduce friction. Traditional examples include wooden drawer runners and sliding window components.
So yes, wax can sometimes make a wooden connection slide more easily.
But:
wax is not the first thing I would use when a miniature tab physically does not fit.
If the tab is genuinely too large for the slot, lubrication does not correct the dimensions.
Sanding does.
A better sequence is:
Dry-fit → inspect → clean → sand if needed → test again → consider wax only if friction remains appropriate to the joint.
When Wax Makes More Sense
Wax is more useful when the fit is basically correct but friction is affecting a part that is designed to:
slide,
rotate,
move,
or repeatedly rub against another wooden surface.
Mechanical wooden models are a particularly obvious example.
A tiny amount of dry wax on designated friction points can reduce resistance.
For a fixed miniature-house wall connection, however, sanding a genuinely tight tab is usually the more predictable solution.
Do Not Wax a Surface You Plan to Glue
This is important.
Adhesive manufacturers generally specify that bonding surfaces should be clean and free of contaminants such as wax, oil, grease, and residue.
So if your plan is:
wax this tight tab → later glue it permanently
you may be creating another problem.
Keep wax away from surfaces that need an adhesive bond.
If the connection requires glue, adjust the fit mechanically instead.
What If the Tab Has Already Snapped?
First:
do not keep assembling as if nothing happened.
Put the broken piece somewhere safe.
Then look at the break.
If both pieces still fit together cleanly, a small wood-to-wood break can often be repaired with an appropriate PVA or wood-compatible adhesive.
Manufacturer guidance for wood glue emphasizes clean, dry, close-fitting surfaces and sufficient curing time. Some common PVA wood adhesives specify around 20–30 minutes of clamping and approximately 24 hours for a full cure, although the exact time depends on the adhesive you use.
For a miniature tab, you probably will not use a woodworking clamp.
Instead, careful alignment can often be held with:
tweezers,
low-tack masking tape,
or gentle finger pressure for the initial set.
Then leave it alone.
The hardest part is often resisting the urge to test the repair immediately.
Do Not Put a Freshly Repaired Tab Back Into the Same Tight Slot
This is where an easily repairable problem becomes a repeating one.
You glue the tab.
It looks perfect.
Ten minutes later you try inserting it into the exact same tight slot.
Snap.
Again.
The repaired adhesive joint has not necessarily reached full strength, and the fit problem that caused the original break still exists.
So the correct order is:
repair → cure → fix the tight slot → dry-fit gently → continue assembly.
Never:
repair → force it straight back into the problem.
What If the Tab Is Gone Completely?
A missing tab does not always mean the project is ruined.
First, dry-fit the larger pieces.
Ask what the tab was doing.
Was it:
aligning the piece,
holding it temporarily,
carrying structural load,
or helping several walls lock together?
If the surrounding surfaces still align correctly, you may be able to bond the larger joint directly.
For a hidden structural area, a thin backing strip of spare wood can sometimes reinforce the connection by spreading the load across a larger surface rather than relying on the original tiny tab.
The repair does not have to reproduce the original tab perfectly.
It needs to restore:
alignment and sufficient strength.
When Glue Is Better Than Rebuilding the Tab
Imagine a small wall panel originally had three tabs.
One snaps.
The other two still position the wall correctly.
In that case, rebuilding a tiny replacement tab may add more complexity than necessary.
If the structure aligns properly and the joint can be reinforced invisibly, a small adhesive repair may be enough.
This is also where your Best Glue for Miniature Houses guide becomes useful: the correct adhesive depends on whether you are joining wood, paper, plastic, metal, or mixed materials.
When You Should Stop and Request a Replacement Part
Not every broken part should be repaired.
Consider replacing the piece when:
the main structural panel is badly split,
multiple tabs have broken,
the break runs through a highly visible printed area,
the damaged part controls a moving mechanism,
repairing it would change critical alignment,
or the component was already damaged before assembly.
A tiny decorative tab and a precision gear support are not the same problem.
The more important the part is to alignment or movement, the less improvisation you should accept.
The Best Prevention Routine
Before inserting an important wooden tab, use the same quick routine every time.
1. Check the orientation. Make sure you have the correct piece and direction.
2. Inspect the edges. Remove any obvious burrs or remaining attachment points.
3. Dry-fit gently. See how much resistance the connection has before adding adhesive.
4. Stop if the part flexes. Flexing is information, not an instruction to push harder.
5. Sand only where needed. Take a few light passes and test again.
6. Support delicate parts. Hold close to the tab and push in the direction of insertion.
7. Use wax selectively. Only for appropriate friction or moving surfaces, and not where glue needs to bond.
8. Continue only when the fit feels controlled.
This process may add thirty seconds to a connection.
It can save an hour of repair.
How Tight Should a Wooden Press-Fit Be?
There is no universal amount of pressure because materials and joint designs differ.
But a useful practical distinction is:
Snug
The tab requires controlled pressure but advances smoothly into the slot.
That is usually fine.
Tight
The tab begins entering, then resistance increases noticeably.
Stop and inspect before continuing.
Extremely tight
The surrounding piece bends, the slot spreads, or you need significant force.
Do not continue.
Correct the fit.
The goal is not to make every connection loose.
Press-fit joints need enough friction to stay assembled.
You are looking for the point between:
falls out
and
breaks going in.
Should You Hammer Wooden Miniature Pieces Together?
Usually, no.
A hammer magnifies force and gives you less feedback about what is happening inside a tiny joint.
If a specific kit provides a miniature mallet and tells you to use it on a particular step, follow the supplied instructions.
Otherwise, a tab that requires heavy hammering may be telling you the fit needs attention.
The delicate printed surfaces and thin plywood commonly found in miniature kits are not the same as heavy woodworking joints.
Control matters more than force.
Should You Sand Every Wooden Piece Before Building?
No.
If a piece fits properly, there is no reason to alter its dimensions.
Sanding every tab automatically can create the opposite problem:
loose joints.
Use sanding as a targeted adjustment.
Inspect.
Test.
Sand only the areas that need it.
The goal is not “perfectly smooth wood everywhere.”
The goal is correct fit.
Can You Over-Sand a Wooden Tab?
Absolutely.
If you remove too much material, a press-fit joint may no longer hold itself in place.
That can lead to:
wobbly walls,
pieces that repeatedly pop out,
misalignment,
and a new dependence on glue.
This is why fine abrasive and frequent testing are safer than aggressive sanding.
You cannot put the sawdust back onto the tab.
Why Do Some Tabs Fit While Others in the Same Kit Are Too Tight?
A miniature can contain dozens or hundreds of connections.
They may involve:
different sheet thicknesses,
different materials,
different slot shapes,
printed or coated surfaces,
long tabs,
short tabs,
and pieces cut from different areas of a sheet.
So one perfectly fitting joint does not guarantee that the next one will behave exactly the same way.
Treat each important press-fit as its own connection.
Do not assume:
“The last ten worked without sanding, so this one just needs more force.”
FAQ
What should I do if a wooden tab won’t fit?
Stop pushing it.
Check that the part is correctly oriented, inspect both the tab and slot for burrs or obstructions, and lightly sand the interfering surface if necessary.
Test the fit after every few passes instead of removing a large amount of material at once.
What grit sandpaper should I use for miniature wooden tabs?
For small fit adjustments, a fine abrasive gives you better control than coarse paper.
Around 180–220 grit is a reasonable starting range for light edge cleanup and small adjustments. General abrasive guides classify 180 as fine and 220 as very fine for wood.
If the piece is painted or printed, protect the visible surface and sand only the hidden contact area.
Should I sand the tab or the slot?
Start with whichever surface is clearly causing the interference.
In many cases, sanding the tab is easier to control.
If the tab is too thick, remove tiny amounts from its contact faces rather than unnecessarily shortening the end.
If the slot contains a burr or residue, clean the slot instead.
Can I use wax on tight wooden miniature pieces?
Sometimes.
Paraffin and beeswax are traditionally used to reduce friction between wood surfaces.
But if a tab physically does not fit, sanding is a better first solution.
Avoid waxing any surface that you later intend to glue because wax can interfere with adhesive bonding.
How do I repair a broken wooden tab?
If the tab snapped cleanly, carefully align the pieces and use a small amount of appropriate wood-compatible adhesive.
Allow it to cure fully before putting the joint under stress.
Most importantly, fix the tight slot or fit problem before trying to insert the repaired tab again.
Can I use super glue on a broken wooden tab?
A precision CA adhesive can bond wood and may be useful for some tiny repairs, particularly when a very fast set is needed.
However, a wood-compatible PVA gives you more positioning time for a clean wood-to-wood break.
The best choice depends on the size of the break, how much alignment time you need, and whether the repaired area will be visible.
For a broader comparison, see Best Glue for Miniature Houses: What Actually Works on Wood, Paper & Plastic.
Why do my miniature pieces keep breaking when I remove them from the sheet?
The part may still be attached at one or more small holding points.
Instead of twisting or bending a delicate part until it releases, inspect the edges and carefully cut remaining attachment points with an appropriate sharp craft knife.
Support thin pieces while removing them.
Should wooden miniature pieces be difficult to push together?
Some press-fit connections should feel snug.
They should not normally require so much force that the surrounding wood bends, cracks, or starts splitting.
If that happens, stop and adjust the fit rather than pushing harder.
Final Thoughts
A broken wooden tab can feel completely random.
Often, it is not.
The warning signs were already there:
the tab stopped moving,
the wood began flexing,
the slot felt unusually tight,
or the piece refused to leave the sheet cleanly.
Learning to notice those moments changes the way you build.
Instead of asking:
“How hard can I push this?”
you begin asking:
“Why is this resisting?”
Sometimes the answer is a tiny burr.
Sometimes the tab needs two passes with fine sandpaper.
Sometimes the piece is simply facing the wrong direction.
And occasionally, a little wax is useful where wood is meant to move against wood.
The important thing is that none of those problems are solved by increasing force indefinitely.
Miniature building rewards patience in a very literal way.
Sometimes the difference between a satisfying click and a broken tab is simply stopping five seconds earlier.



One Comment