What Tools Do You Really Need for a Miniature House Kit?
You buy your first miniature-house or book-nook kit.
Then, before you have even opened the wooden sheets, another question appears:
Do I need to buy a tool kit too?
A quick search does not make things clearer.
Suddenly people are recommending precision knives, five kinds of tweezers, sanding sticks, cutting mats, pliers, clamps, rulers, magnifying lamps, paint markers, micro brushes, pin vises, wire cutters, and enough equipment to make your kitchen table look like a professional model-making studio.
If this is your first miniature, you probably do not need most of that.
For a typical beginner-friendly miniature house or book nook, a surprisingly small set of tools can handle most of the problems you are likely to encounter.
The tools that matter most are not necessarily the most specialized ones.
They are the ones that help you do four basic things more easily:
hold tiny pieces, adjust tight pieces, control adhesive, and see what you are doing.
Everything else can come later.
Quick Answer: What Tools Do You Need for a Miniature House?
For most beginners, I would start with good tweezers, fine sandpaper or a small sanding stick, an appropriate craft glue if the kit requires it, good lighting, and something small for applying glue precisely.
If the project requires you to cut paper, fabric, or wooden attachment points, add a precision craft knife or small sharp scissors and a proper cutting mat.
That is enough for many first builds.
You do not need to buy a 30-piece miniature tool set before you know which parts of the hobby you actually enjoy.
Beginner discussions repeatedly arrive at a similar conclusion. Some experienced builders use very few tools, while others gradually build larger collections as they begin customizing. Tweezers, sanding tools, adhesive, and basic cutting tools appear again and again as the most useful starting items.
Miniature House Tool Quick Reference
| Tool | Do You Need It for Your First Kit? | What It Helps With | My Priority |
|---|---|---|---|
| Pointed tweezers | Almost always useful | Tiny decorations, stickers, wires, paper parts | Essential |
| Fine sandpaper / sanding stick | Very useful | Tight wooden tabs, rough edges, attachment points | Essential |
| Appropriate craft glue | Depends on the kit | Paper, wood, fabric and loose details | Essential if not supplied |
| Toothpicks / precision glue applicator | Very useful | Controlling tiny amounts of glue | Essential |
| Good desk light | Highly recommended | Part numbers, alignment, tiny details | Essential |
| Small sharp scissors | Often useful | Paper, fabric, thread and printed parts | Very useful |
| Precision craft knife | Depends on construction | Accurate cutting and removing small tabs | Very useful |
| Cutting mat | Needed if using a craft knife | Protects table and gives a stable cutting surface | Very useful |
| Metal ruler | Useful with a knife | Straight paper cuts | Nice to have |
| Nail file | Excellent sanding alternative | Small tabs and narrow edges | Very useful |
| Small clamps / binder clips | Occasionally useful | Holding glued pieces while they set | Nice to have |
| Magnifying lamp / reading magnifier | Depends on eyesight and scale | Very small parts and printed numbers | Nice to have |
| Needle-nose pliers | Only for certain kits | Wire shaping and difficult small hardware | Optional |
| Wire cutters | Only if the kit requires wire work | Cutting metal wire cleanly | Optional |
| Paint / furniture markers | Mostly cosmetic | Hiding pale laser-cut edges | Optional |
| Large miniature tool kit | Usually unnecessary | Convenience and customization | Wait until later |
The important distinction here is between tools needed to finish the kit and tools that make building more comfortable.
Those are not the same thing.
1. Tweezers Are Probably the First Tool I Would Buy
If there is one tool that repeatedly comes up in miniature-building discussions, it is tweezers.
And the reason is simple.
Your fingers do not shrink just because the furniture does.
A miniature kit can contain objects only a few millimeters across:
paper labels,
door handles,
flowers,
tiny books,
wire connections,
stickers,
and decorative pieces that have to land in exactly the right place.
Trying to position one of these between two fingertips can be unnecessarily frustrating.
Pointed tweezers give you:
more visibility,
more control,
and access to places your fingers cannot comfortably reach.
Recent beginner threads repeatedly recommend tweezers as one of the first tools worth having, especially for precise placement and working inside partially assembled scenes.
You do not need six specialized shapes on day one.
A comfortable pair of fine pointed tweezers is enough to start.
Straight Tweezers vs Curved Tweezers
If you eventually buy a second pair, curved tweezers can be surprisingly useful.
Straight pointed tweezers are excellent for:
general placement,
stickers,
paper,
and picking up small flat pieces.
Curved tweezers make it easier to reach:
behind furniture,
under shelves,
into corners,
and around pieces that are already installed.
But this is very much a quality-of-life upgrade.
Do not postpone your first miniature because you only own one pair of tweezers.
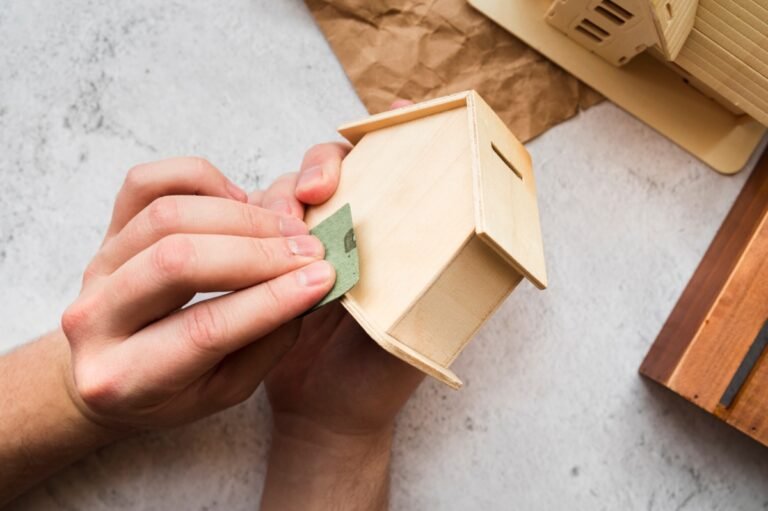
2. Fine Sandpaper Solves More Problems Than Beginners Expect
Sandpaper does not look like an obvious miniature tool.
Then you encounter your first wooden tab that is almost the right size.
It enters the slot.
Stops.
You push harder.
The surrounding wood begins bending.
This is exactly where a small sanding tool earns its place on the table.
Fine sandpaper can help with:
tight-fitting tabs,
rough laser-cut edges,
tiny burrs,
and small attachment points left after removing a piece from the wooden sheet.
Beginner book-nook discussions regularly mention discovering that extra sandpaper or a nail file was much more useful than expected. Some builders specifically prefer nail files because they are easier to grip and control than the tiny loose square of sandpaper sometimes supplied with a kit.
For very small fit adjustments, the goal is not aggressive material removal.
It is control.
Norton classifies 180 grit as fine and 220 as very fine in its wood-sanding guide. For miniature tabs where only a tiny adjustment may be needed, these finer abrasives are much easier to control than very coarse sandpaper.
Make one or two passes.
Test the piece.
Then sand again only if necessary.
You cannot put the wood back once it is gone. If tight-fitting wooden pieces are one of the things making you nervous, see my guide on how to stop wooden tabs from breaking in miniature and book nook kits for a step-by-step look at dry-fitting, sanding, wax, and broken-tab repair.
A Nail File May Be More Convenient Than Sandpaper
One of the cheapest miniature tools may already be in your bathroom.
A simple fine nail file or emery board works surprisingly well on small wooden tabs.
It has two advantages over a loose sheet of sandpaper.
First, it is rigid enough to control exactly where you remove material.
Second, its narrow shape lets you reach a small tab without accidentally sanding the decorative surface next to it.
Builders frequently recommend nail files for exactly this reason.
If you already own one, there is no urgent need to buy a dedicated miniature sanding system.
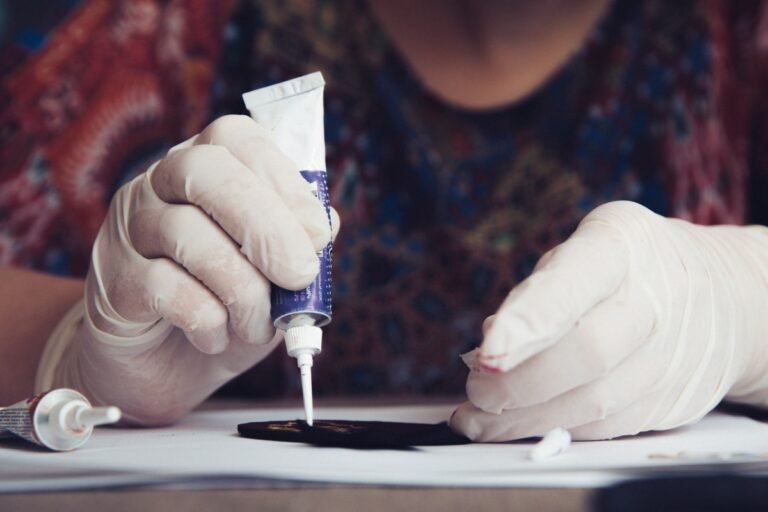
3. Glue Matters, but the Applicator May Matter Almost as Much
If your miniature requires glue, you obviously need an appropriate adhesive.
But something beginners often discover later is that the way you apply the glue can matter nearly as much as which bottle you bought.
A normal craft-glue nozzle is designed for ordinary crafts.
A miniature chair leg may be only a few millimeters wide.
Squeezing the bottle directly onto that connection can turn one tiny drop into a miniature flood.
This is why toothpicks are so useful.
Put a little adhesive onto scrap packaging or another disposable surface.
Then use the end of a toothpick to transfer exactly the amount you need.
A precision-tip bottle, pin, micro brush, or similar small applicator can do the same job.
You usually do not need stronger glue.
You need less glue in the right place. Not sure which adhesive to use on wood, paper, plastic, or fabric? I break down the differences between tacky glue, PVA, super glue, and multi-surface adhesives in my guide to the best glue for miniature houses.
For material-specific choices, I would link this section to your existing article:
Best Glue for Miniature Houses: What Actually Works on Wood, Paper & Plastic
Check the Kit Before Buying Glue
Do not automatically order adhesive with every miniature.
Construction styles vary considerably.
A project may use:
snap-fit wooden connections,
stickers,
double-sided adhesive,
pre-applied adhesive,
or traditional liquid glue.
If your kit uses adhesive strips instead of liquid glue, see what double-sided tape to use for miniature house kits and what to look for when the supplied tape runs out.
Some kits include basic tools or adhesive while others do not, which is another reason beginner communities often recommend checking the box contents before buying a separate tool set.
Read the product contents and instructions first.
The best tool purchase is sometimes the one you discover you do not need.
4. Good Lighting Is More Important Than It Sounds
Miniature building is close-up work.
You are constantly trying to see:
tiny printed numbers,
the edge of a slot,
a thin layer of protective film,
a small amount of glue,
or which side of a 5 mm piece faces forward.
Poor lighting turns all of those into harder tasks.
A bright desk lamp with focused light can make the entire build feel easier.
This is also one reason magnifying lamps appear frequently in more experienced miniature builders’ tool recommendations. A 2026 miniature discussion, for example, described a magnifying lamp as one of the builder’s most important tools when working with paper, fabric, glue, and very small components.
But I would separate:
good lighting
from:
magnification.
Good lighting is useful to almost everybody.
Magnification depends much more on your eyesight and the type of miniature you build.
Start with a well-lit work surface.
Add magnification only if you find yourself repeatedly leaning forward and squinting.
5. Small Sharp Scissors Are More Useful Than Large Craft Scissors
If your project contains paper or fabric, a small pair of sharp scissors can be extremely useful.
Large household scissors work perfectly well for rough cuts.
They become awkward when you need to cut:
a tiny printed book cover,
a narrow fabric strip,
thread,
a miniature plant leaf,
or a small curved paper shape.
Small scissors give you better visibility around the cutting line.
The keyword here is not necessarily “miniature scissors.”
It is:
small, sharp, and comfortable.
Beginner tool discussions regularly mention precision scissors as useful once a project contains more paper or fabric work.
6. Do You Really Need a Craft Knife?
Not always.
Some modern kits arrive with pieces that press cleanly out of wooden sheets and use pre-cut paper details.
In that situation, you may barely touch a knife.
Traditional craft-heavy kits may be different.
A precision craft knife can help with:
cutting straight paper edges,
trimming small printed details,
separating stubborn attachment points,
and making precise cuts that scissors cannot comfortably reach.
Precision craft knives are specifically designed for detailed cutting in materials such as paper, cardstock, thin plastic, and similar craft materials.
But a knife is not something I would recommend buying casually and then using directly on the dining table.
If you need one, you also need an appropriate work surface.
7. If You Use a Craft Knife, Use a Cutting Mat
This pair belongs together.
A self-healing cutting mat protects the table underneath and provides a flat, stable surface for accurate cutting. Manufacturers also note that these mats help preserve a smooth cutting surface and can extend blade life.
For miniature work, you do not need an enormous professional mat.
A smaller mat can be perfectly adequate if you are mainly cutting paper pieces and small decorative components.
The important thing is that your entire cutting motion stays on the protected surface.
And because miniature crafting often puts your fingers close to the material, knife technique matters.
Use a stable cutting surface, keep fingers outside the blade path, cut away from your body, and cover or safely store the blade when you stop working. These are standard knife-safety recommendations rather than miniature-specific advice.
A dull knife is not a safer knife, either.
When a blade becomes dull, you tend to use more pressure.
That makes precise miniature cutting harder and increases the chance of a slip.
Do You Need a Metal Ruler?
Only if your kit involves substantial straight cutting.
A ruler is useful when cutting:
wallpaper,
flooring,
large printed panels,
or repeated straight paper strips.
A metal edge is preferable to a soft plastic ruler when using a blade because a knife can cut into a plastic edge.
But for a mostly pre-cut snap-fit miniature, a ruler may spend the entire project sitting untouched.
This is exactly why I would not buy a complete set of cutting tools before opening your first kit.
Let the project tell you what you need.
8. A Small Parts Tray Can Save More Time Than a Fancy Tool
Miniature pieces have one truly remarkable ability:
disappearing.
A tiny handle falls from your tweezers.
You hear it hit the table.
Then nothing.
For the next ten minutes, you are crawling under a chair looking for something roughly the size of a sesame seed.
A shallow tray, small container, muffin tin, or divided organizer can prevent a lot of this.
This is not a specialized miniature tool.
That is precisely why it is useful.
Keep the pieces for the current step in one controlled area.
Do not empty every tiny bag onto the table at once.
Organization will often improve your building experience more than buying another precision gadget.
9. Binder Clips and Small Clamps Are Useful—but Not Essential
A miniature wall sometimes needs to stay perfectly aligned while glue sets.
Holding it with your fingers for ten minutes is possible.
It is not particularly enjoyable.
Small spring clamps can help.
So can binder clips.
Miniature and paper-craft builders commonly use simple clamps to hold components while adhesive sets. OLFA’s paper-crafting tool guidance even includes clamps among useful general crafting accessories.
But do not clamp delicate miniature pieces blindly.
A strong clamp can:
dent soft wood,
mark a printed surface,
or crush thin components.
For light miniature work, low pressure is usually enough.
And many first kits can be completed without clamps at all.
This is a buy it when you encounter the problem tool.
10. Do You Need Pliers and Wire Cutters?
For many modern book nooks:
probably not.
For traditional miniature houses involving:
metal wire,
flower stems,
lamp construction,
or handmade furniture,
they can become much more useful.
Needle-nose pliers help shape small wire components.
Wire cutters give a cleaner result than damaging a pair of ordinary scissors.
But community discussions around beginner book nooks show exactly why these should not automatically be included in every starter kit: some builders find them useful, while others point out that their particular kit never requires them.
Again:
construction style matters more than the words “miniature house.”
If your project also includes LED lighting, the wiring can look more intimidating than it really is. My beginner guide to wiring miniature house lights covers polarity, loose connections, flickering lights, battery problems, and what to test before you close the walls or roof.
11. Do You Need a Magnifying Lamp?
No.
But some people will love one.
A magnifying lamp can help when you work with:
extremely tiny paper pieces,
miniature wiring,
small printed details,
or long sessions that make close focusing tiring.
Several miniature builders specifically recommend magnification as their projects become more detailed.
However, I would not classify it as a universal beginner essential.
Try your first project under good lighting.
If your main frustration becomes:
“I literally cannot see this part well enough,”
then magnification becomes a sensible upgrade.
That is a much better reason to buy one than because it appeared in somebody else’s 25-piece tool list.
12. Paint Markers Are a Nice Trick, Not a Requirement
Laser-cut wood often exposes a pale edge.
On a dark brown bookshelf, that pale edge can stand out more than you expected.
Some miniature builders use:
furniture touch-up markers,
paint markers,
or alcohol markers
to darken exposed edges and make the finished assembly look more polished.
This technique comes up frequently in book-nook tool discussions.
It can produce a noticeable cosmetic improvement.
But your first project does not require it.
Build the miniature first.
Then look at it.
If the exposed wooden edges bother you, this becomes an easy upgrade for project number two.
Do Not Buy Tools Before You Know What Problem They Solve
This is probably the biggest lesson from looking at beginner tool advice.
Tool collections grow naturally.
Your first miniature teaches you:
I really need better tweezers.
Your second teaches you:
I wish I had a narrower sanding stick.
Then one project contains dozens of tiny straight paper cuts and suddenly a paper trimmer looks useful.
Later you begin customizing furniture and discover clamps, drills, saws, paint tools, and everything else in the miniature world.
That progression makes sense.
Buying all of those tools before project one does not.
A useful tool is something that repeatedly removes friction from the way you build.
Not something another hobbyist owns.
What I Would Buy Before My First Miniature Kit
If I were starting with nothing, I would keep the first setup extremely simple.
I would make sure I had a comfortable pair of pointed tweezers, fine sandpaper or an emery board, an appropriate glue if the kit requires it, toothpicks for applying tiny amounts of adhesive, and a bright desk lamp.
Then I would open the kit.
If the instructions required cutting, I would add sharp small scissors and, when precision knife work was genuinely necessary, a craft knife with a proper cutting mat.
That is enough to learn whether I actually enjoy miniature building.
Everything else can wait.
The beginner community is surprisingly consistent on this point: you can start very simply. One discussion included builders who had completed several projects before buying additional equipment, while another described glue, a mat, and tweezers as the closest thing to core requirements.
What I Would Not Buy Yet
I would not start by ordering a large professional miniature toolkit.
Not because those tools are useless.
Many are excellent.
But a big kit often contains tools you may never need while still missing the one tool that would actually improve your particular project.
I would also wait on specialized clamps, wire-forming tools, expensive magnification, paper trimmers, punches, micro drills, miniature saws, and advanced painting equipment.
Those are tools for answering problems you have not encountered yet.
Your first miniature already contains enough new things.
You do not need to learn an entire workshop at the same time.
The Best Tool Depends on What Kind of Miniature You Build
This is why two experienced builders can give completely different answers to the same question.
One person builds mostly modern press-fit book nooks.
Their favorite tools may be:
tweezers and a sanding stick.
Another builds traditional miniature houses with fabric, wire, paper, and handmade furniture.
Their workbench may include:
pliers, knives, scissors, glue applicators, clamps, cutting mats, brushes, and magnification.
Another person heavily customizes every kit.
Now they need painting tools.
None of these people is wrong.
They are doing different versions of the same hobby.
A useful beginner toolkit is therefore not:
everything a miniature builder could possibly use.
It is:
the smallest set of tools that makes your current project easier.
A Simple Way to Upgrade Your Tools
After each build, think about the moments that annoyed you most.
If tiny parts kept slipping from your fingers, improve your tweezers.
If wooden tabs were difficult to adjust, get better sanding sticks or small files.
If glue went everywhere, improve your adhesive applicator.
If you struggled to see parts, improve your lighting or add magnification.
If paper cuts were messy, improve your cutting tools.
This approach creates a tool collection based on experience.
It also has another advantage:
every tool you buy has a job waiting for it.
FAQ
Do miniature-house kits come with tools?
Some do, some do not.
Depending on the project, the box may include basic items such as tweezers, sandpaper, a small screwdriver, or adhesive. Other kits expect you to provide some tools yourself.
Check the contents before buying anything separately. Beginner discussions regularly show large differences between what individual kits include.
Do I need tweezers for a miniature house?
They are not always strictly necessary, but they are one of the most consistently useful miniature tools.
Tweezers make it much easier to place tiny paper parts, decorations, wires, stickers, and objects inside areas your fingers cannot comfortably reach.
What sandpaper should I use for miniature wooden pieces?
For small fit adjustments, fine abrasive gives you much more control than coarse sandpaper.
Around 180–220 grit is a useful range for gentle edge work; Norton classifies 180 grit as fine and 220 grit as very fine.
For tiny tabs, an emery board or narrow sanding stick can be easier to control than a loose sheet.
Do I need a craft knife for a book nook?
Not necessarily.
If the kit uses pre-cut pieces and stickers, you may barely need one.
A craft knife becomes more useful when you need precise paper cutting, trimming, or help releasing delicate attachment points.
If you use one, work on an appropriate cutting mat and follow basic blade safety practices.
Do I need a cutting mat?
If you are using a craft knife, yes, I strongly recommend one.
A proper cutting mat protects the work surface and provides a stable area for precision cuts. Self-healing mats are designed to maintain a relatively smooth working surface even after repeated cutting.
If your project requires no knife cutting, it becomes much less important.
Do I need pliers for miniature houses?
Only for certain projects.
Pliers are useful when you need to bend or position metal wire, but many modern press-fit miniature kits require little or no wire shaping.
Wait until you know the construction style.
Are miniature tool kits worth buying?
They can be convenient, especially if the included tools match the kind of miniature work you do.
But beginners do not need a large tool kit simply to start.
Buying a few good basics first and adding tools when a specific need appears is often more practical.
Is a magnifying lamp necessary?
No.
Good lighting is more universally useful.
A magnifier becomes worthwhile if very small parts are genuinely difficult for you to see or if you spend long periods doing detailed close-up work.
What are the most important tools for a complete beginner?
If I had to keep the setup minimal, I would prioritize:
tweezers, fine sanding material, appropriate adhesive, a precision glue applicator or toothpicks, and good lighting.
Add cutting tools only when the kit actually requires cutting.
Final Thoughts
Miniature building has an unusual ability to make ordinary household objects feel like specialized equipment.
A toothpick becomes a precision glue applicator.
A nail file becomes a miniature woodworking tool.
A muffin tray becomes a parts organizer.
And a pair of tweezers may end up being used more than almost anything sold in an elaborate hobby toolkit.
That is why I would not worry too much about having the “perfect setup” before starting.
Open the kit.
Read the first few pages.
See what the project actually asks you to do.
Then solve those problems one at a time.
For most first builds, you do not need a miniature workshop.
You need enough control to pick up a tiny part, enough patience to sand a tab instead of forcing it, enough light to see where it belongs, and enough restraint not to cover the whole thing in glue.
Everything else can grow with the hobby.
If you are trying to plan your first project around your free time, I also put together a realistic guide to how long it takes to build a miniature house or book nook.
And if you finish your first miniature and immediately start thinking about which tweezers you want next—
then you probably already know this is not going to be your last one.